To use a shoe stretcher for bunions and wide feet, first insert the stretcher firmly into the shoe, ensuring full contact with the toe and heel blocks. Attach a properly sized bunion plug if targeting bunion pressure. Adjust the T Handle to widen the shoe gradually by up to 3 cm, monitoring pressure to avoid damage. Leave the stretcher in place for at least eight hours. After removal, assess the fit and comfort, refining adjustments as needed. Additional guidance can enhance your technique.
Key Takeaways
- Insert the shoe stretcher fully, ensuring toe and heel blocks are securely in place without damaging the shoe structure.
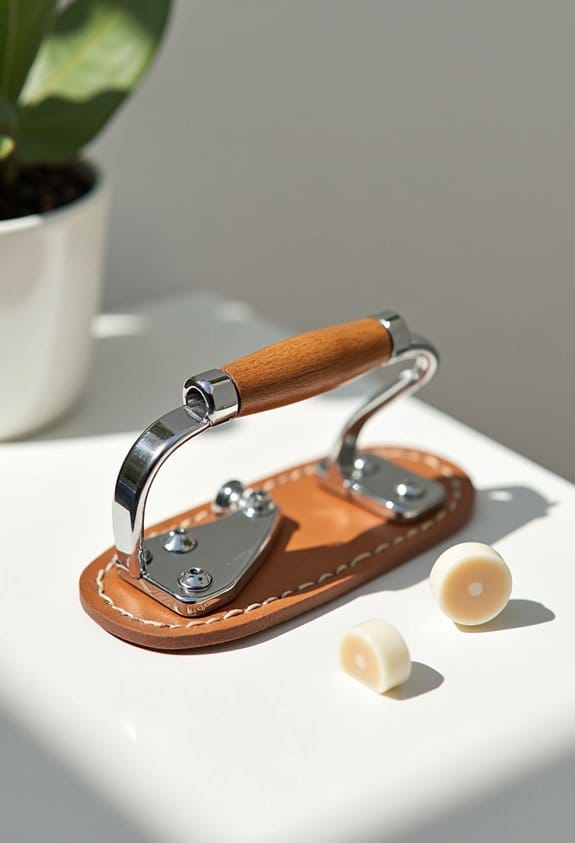
- Use a properly sized bunion plug inserted into the stretcher to target bunion-specific pressure areas effectively.
- Adjust the T Handle gradually to widen the shoe by 1-3 cm, monitoring pressure to avoid overstretching or material damage.
- Assess fit by checking toe box space and walking briefly to identify any discomfort or tightness around the bunion.
- Introduce stretched shoes gradually with thick socks and moisturizing cream to enhance comfort and reduce friction on bunions.
Preparing Your Shoe Stretcher for Use

Before inserting the shoe stretcher, begin by closing it completely, turning the T Handle counterclockwise until compact. This guarantees the device is small enough to fit inside your shoe without causing damage. Next, adjust the lengthening drum clockwise to position the heel block correctly, preparing for accurate stretching. If treating bunions specifically, do not insert the bunion plug yet, as this will be covered separately. Carefully insert the shoe stretcher into your shoe, pushing and wiggling it until both the toe and heel blocks are fully seated and secured in place. Unlike shoe trees, which merely maintain shoe shape, the shoe stretcher actively widens and lengthens the shoe. Accurate preparation guarantees effective and safe stretching, preventing damage while addressing fit issues related to bunions and overall comfort. Additionally, choosing insoles with proper arch support can complement the stretching process by improving overall foot comfort and alignment.
Selecting and Inserting the Bunion Plug

How should one select the correct bunion plug for precise shoe stretching? Choose a bunion plug sized accurately to the location and severity of your bunion to guarantee targeted pressure on the affected area. For effective stretching, insert the plug securely into the shoe stretcher’s area aligned with the bunion site. This focuses stretching on one side of the shoe where the bunion causes tightness. Before insertion, place the stretcher properly inside the best shoe available, confirming proper alignment. Avoid excessive force during this process to prevent shoe damage or increased discomfort. Keep the bunion plug in place for a minimum of eight hours, allowing the material to adapt gradually. Consistent use of the correct plug size and insertion method delivers ideal results for bunion-related shoe stretching. Using adjustable shoe stretchers with four-way expansion can enhance comfort by specifically targeting bunion areas during the stretching process.
Positioning the Stretcher Inside the Shoe

When positioning the shoe stretcher inside the shoe, begin by inserting the toe block firmly into the front, guaranteeing it reaches fully into the toe area for maximum coverage. Different shoe types require attention to specific stretcher materials, as wood or plastic models behave differently during insertion. Next, swivel the heel block down into the shoe while pressing the stretcher upward, securing its position according to established placement techniques. If using a bunion plug, insert it beforehand to target problematic areas accurately. Throughout the process, ensure both toe and heel blocks fit snugly without altering the shoe’s structure or causing damage. Finally, verify proper alignment by checking that the stretcher sits evenly inside, allowing for effective stretching of the designated shoe sections. Using storage solutions like stackable shoe boxes helps maintain shoe shape and organization during the stretching process.
Adjusting Length and Width for Optimal Fit

After positioning the stretcher securely inside the shoe, begin adjusting its length and width to achieve the desired fit. Use the metal T Handle to widen the shoe up to 1-3 cm, which is effective for accommodating bunions and wide feet. Turn the Lengthening Drum to lengthen the stretcher, matching the shoe size accurately without overstretching. Incorporating a bunion plug can enhance targeted relief for problem areas. Follow proper fitting techniques by making incremental adjustments and avoiding rapid, excessive stretching to prevent damage. Common mistakes include forcing the stretcher beyond the shoe’s natural limits or neglecting gradual adjustments, which can distort the shoe. Aim for snug tension that conforms to the foot’s dimensions. This methodical approach guarantees the shoe expands comfortably and maintains its structural integrity. Many adjustable shoe stretchers feature two-way stretching functionality to provide both length and width adjustments for a precise fit.
Monitoring and Controlling the Stretching Pressure

Maintaining consistent monitoring of the stretching pressure is essential to prevent damage and guarantee an effective fit. Your stretching techniques should emphasize gradual adjustments, using the metal T Handle to expand the toe block while ensuring a snug but manageable tension. Proper pressure management requires frequent checks to avoid excessive force that could compromise the shoe’s material sensitivity. If you detect any discomfort or strain, immediately decrease the pressure to protect the shoe’s structure. Periodically evaluating the stretcher’s snugness allows for precise control, enabling subtle incremental expansions without over-stretching. This attentive approach preserves the integrity of delicate materials and supports targeted relief for bunions and wide feet, ensuring the shoe stretches evenly and effectively, adapting to your specific foot shape. Combining shoe stretchers with FOOTMATTERS Shoe Stretch Spray further softens materials and enhances the stretching process for better results.
Recommended Duration for Leaving the Stretcher In
Although stretching should be done gradually, the shoe stretcher must remain inside the shoe for a minimum of eight hours to allow adequate fiber relaxation and effective expansion. Ideal stretching times depend on the shoe material, with leather and synthetic fabrics benefiting from up to 24 hours for thorough adjustment. You should verify the stretcher is secured snugly without causing excessive pressure, which helps avoid damage while reaching desired width, especially around bunions or wider feet. Material considerations influence how long fibers take to adapt, so consult manufacturing guidelines when possible. Following these shoe maintenance tips will help maintain the shoe’s structural integrity and prolong its lifespan. Consistent monitoring during extended use is essential to prevent overstretching and preserve comfort throughout the process. Additionally, using a shoe stretcher that matches the shoe’s size can optimize the effectiveness of lasting and preserve material quality.
Safely Removing the Stretcher From Your Shoe
Once the shoe stretcher has rested inside the shoe for at least eight hours, you can begin the removal process by first closing the toe block. Turn the T-handle counterclockwise to secure this component, ensuring the stretcher is properly contracted. Next, gently wiggle the stretcher while applying light pressure to avoid damaging the shoe’s structure. Start by carefully pulling out the toe block, then ease the heel block upward. Removing the stretcher efficiently requires following this specific order to prevent common stretching mistakes such as forcing or twisting the device. Incorporating these shoe care tips preserves the integrity of the material and fit. Always handle the stretcher slowly, as hasty removal risks compromising the shoe’s shape and durability. For best results, regular use of the stretcher is recommended to maintain a comfortable and customized fit during the stretching process, especially for bunion relief.
Checking the Fit After Stretching
How should you evaluate the effectiveness of the shoe stretching process? Begin by performing fit assessment methods, such as putting on the shoe and checking for adequate space in the toe box, especially near the bunion area. Walk around briefly to detect any pressure points or discomfort, which often result from common stretching mistakes like uneven expansion. Pay close attention to how your foot settles inside the shoe; ascertain there is no rubbing on the bunion or excessive tightness along the sides. It is critical to try on both shoes after stretching, as adjustments may differ between them. If discomfort remains, consider additional stretching or consult a professional. Proper fit assessment directly contributes to bunion pain relief by eliminating constriction and promoting comfort. Using incremental adjustments can help ensure the shoe stretcher expands the necessary areas gently and effectively.
Tips for Maintaining Comfort With Stretched Shoes
To maintain comfort with stretched shoes, wear them gradually to allow your feet to adapt without causing strain or discomfort. Begin by wearing the shoes for short periods while using thick socks to enhance bunion relief by cushioning tight areas. Regularly monitor the shoe fit, as materials may relax further with continued use, potentially requiring adjustments. Employ comfort tips such as applying moisturizing foot creams to reduce friction and prevent irritation on sensitive skin exposed after stretching. Preserve shoe shape through proper shoe care practices, including using shoe trees or storing shoes in their original form, which prevents them from contracting. These strategies guarantee stretched shoes retain excellent fit and support, promoting lasting comfort and mitigating issues related to wide feet or bunions. Additionally, choosing shoes with durable laces that maintain secure fit can further enhance comfort and support during wear.
Frequently Asked Questions
Do Shoe Stretchers Work for Bunions?
Shoe stretchers effectively reduce shoe discomfort by creating additional space, serving as viable bunion solutions. They promote foot health by alleviating pressure on bunions, improving comfort, and preventing further irritation caused by tight or narrow footwear.
How to Use a Shoe Stretcher for Width?
To use a shoe stretcher for width, select appropriate shoe stretcher types based on shoe material. Employ gradual stretching techniques, turning the handle to expand width carefully, ensuring material compatibility to prevent damage and optimize comfort.
How Long Do You Leave a Shoe Stretcher in Your Shoe?
A shoe stretcher should remain in the shoe for at least 8 to 24 hours depending on shoe stretcher types and best materials. Maintenance tips include periodic checks to avoid over-stretching and ensuring proper cleaning to preserve stretcher longevity.
Do Wide-Width Shoes Help With Bunions?
Wide-width shoes greatly improve shoe comfort by reducing pressure on bunions, aiding bunion prevention. Their spacious design promotes better foot health, accommodating foot shape changes and minimizing discomfort during daily activities or prolonged standing.


